*\*\*\* All print jobs will be held in a secure queue until you release (print) them or delete them from the job list at an Printer. If not printed or manually deleted, they will be automatically deleted after 8 hours. \*\*\**
# How to Print- Part 2 (Staff Login Printer) ## Printer Sign in**There are 3 ways to login to the MFPs…**
##### **Click the arrows on the left side to display directions:**The first time you do this, you will be prompted to enter your **Username** (fist initial, last name. ex=jdoe) and **Password** ( related to your CCA Google Workspace Account )to associate the card with your cca-print account. After that, simply TAP and it will identify your account.
*\*\*\* The default settings for CCA print jobs are B/W and Double-sided. \*\*\**
# How to use the PaperCut Print system - Faculty and Staff- Full All new Toshiba multifunction printers (MFPs) will be streamlined to have the same buttons/functions. The image below is an example of the main login screen and button functions. 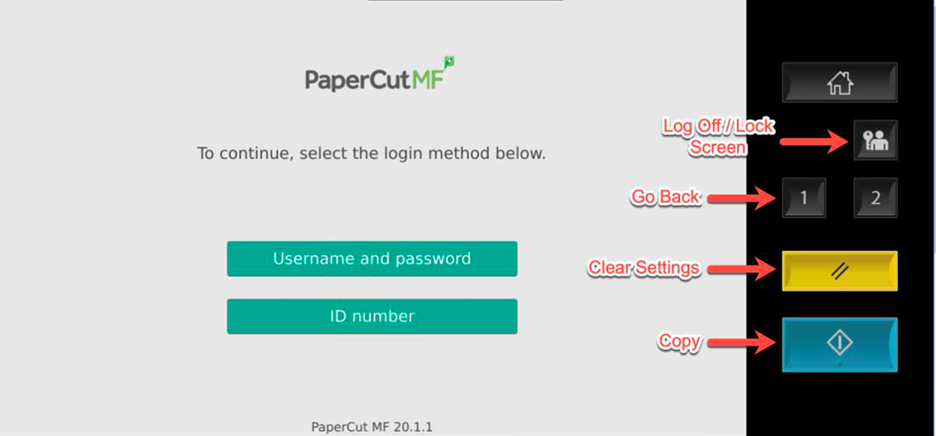 ## Printer Sign in**There are 3 ways to login to the MFPs…**
1. Tap your **ID card** on the MFP at the icon (shown below) to left of the touch panel*.*The first time you do this, you will be prompted to enter your **Username** (fist initial, last name. ex=jdoe) and **Password** to associate the card with your account. After that, simply TAP and it will identify your account.
 1. Type **ID number.** 2. Enter **Username** *(full email address)* and **Password** Once logged in, you have 3 options: 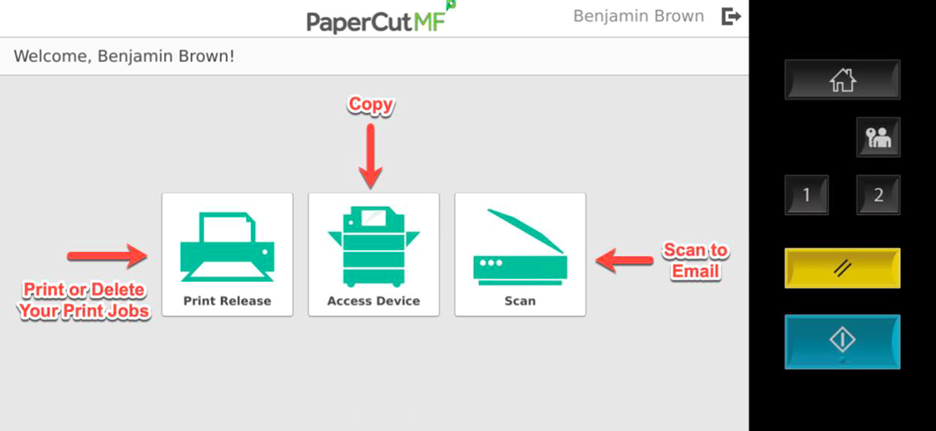 1. **Print** 2. **Copy** 3. **Scan** - to ***Email***, ***Fax***, or ***Google Drive*** The system will automatically log you off after 45 seconds of no activity. To manually log off, you can click the **Log Off / Lock Screen** or **Clear Settings** buttons *(see image above)*, or click the log out icon next to your name in the top section of the touch screen *(see image below)*. **How to Submit a Print Job** We will be deploying **PaperCut Print Deploy Client** to all school computers. Once the software is installed, it will automatically open its main window *(see below)*, prompting the user to sign-in. 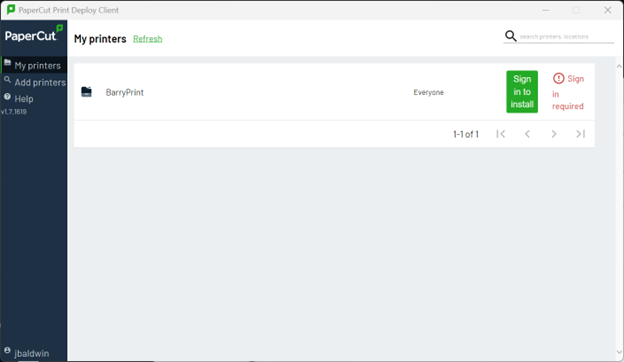 Once you sign-in, the new **FOLLOW-ME** print queue will be installed on the computer, and will appear in your printer list when you go to print. If you see the green **Sign In** button (as shown in the image above), do so to complete the installation. Use this print queue to send all print jobs to the new release print system.*\*\*\* All print jobs will be held in a secure queue until you release (print) them or delete them from the job list at an MFP. If not printed or manually deleted, they will be automatically deleted after 24 hours. \*\*\**
## Print Job Release **How to Release a Print Job** Login to an MFP *(see steps above)*. Once logged in, you’ll see the number of print jobs/pages in your queue at the top of the screen. You can select the **Print all** button to print them all with no changes. 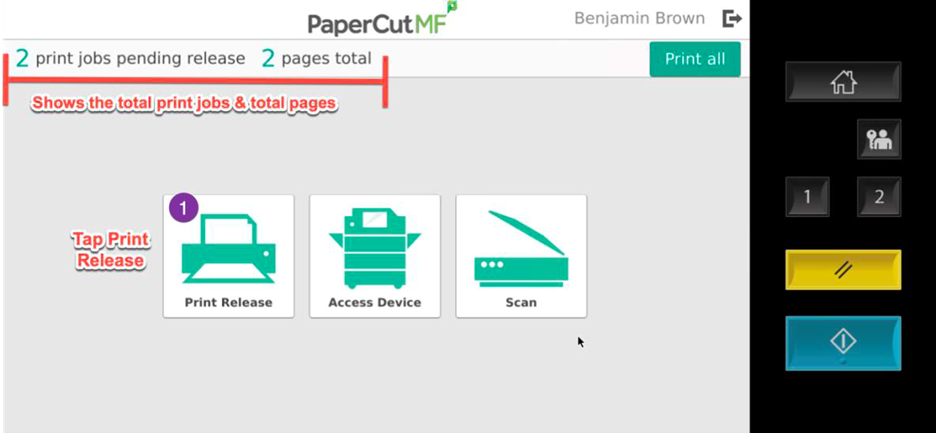 Or tap the **Print Release** button, to view the print job list. Here you can select the specific print job you want to print, and optionally change settings (# of copies, single/double-sided, etc) by tapping the ">" button to the right of the print job. 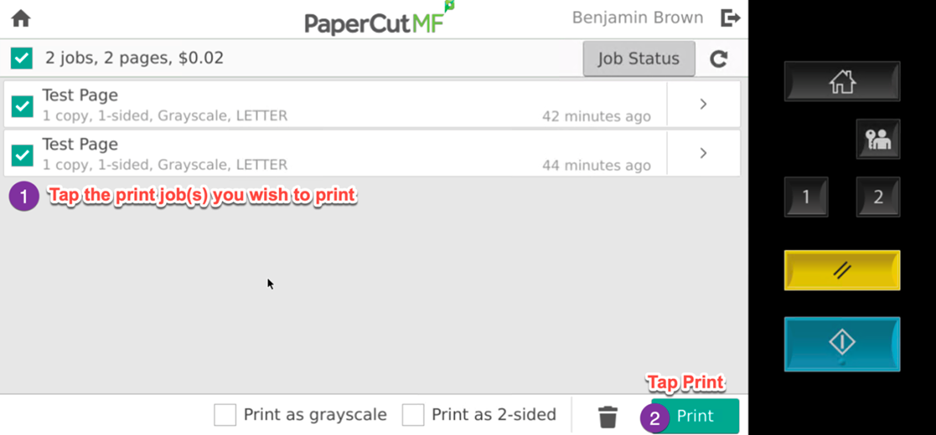 Select the desired job and tap **Print**. You can also manually delete a print job if desired *(before the 24-hour time limit)*.*\*\*\* The default settings for CCA print jobs are B/W and Double-sided. \*\*\**
## Making Copies Login to an MFP *(see steps above)* and tap the **Copy** button. The screen will change to the MFP's copy interface, showing choices for 1 or 2-sided, B/W or Color, # of copies, etc. Tap the Copy physical button to start the copy, or you can tap the **1** button to go back *(see example image below)*. 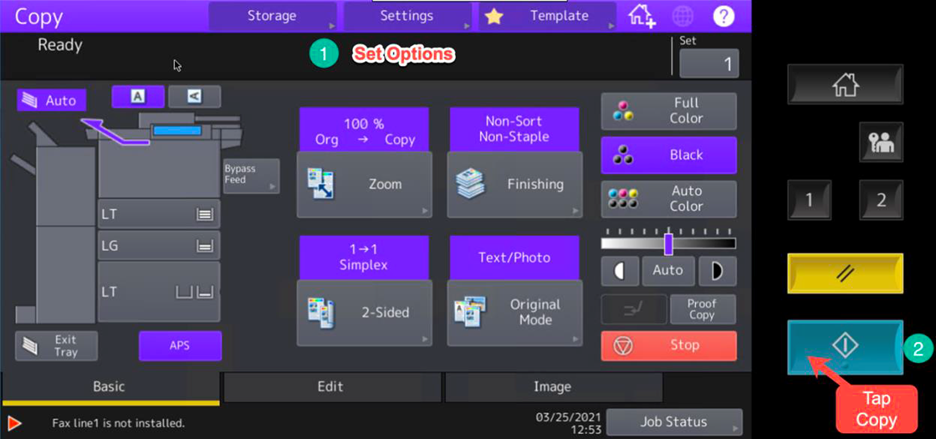 **Scan to Email/Other email** When you select **Scan to Email**, your CCA email is automatically used as the source for the scanned email. You can change the **Filename** for the scanned file or change DPI and other settings *(these are all optional)*. Then load the paper to scan and tap **Start**. When prompted you can load additional paper or simply tap **Finish** to completed the scan and send the email. The scanned page(s) will come into your CCA email inbox, with your CCA email as the sender. If you don’t see the email in your inbox, check your Junk folder. **Scan to Other Email** works the same way, except you must fill in the **Email** field for the email you want to send the scans to.